Left-hand and arm pain while playing violin is a common challenge for students. As a violin teacher, one of my goals is to help alleviate this discomfort among students, particularly adult learners, by cultivating a technique that promotes a neutral and relaxed way of playing. While many violinists complain about pain in their neck or left shoulder, it’s important to note that discomfort in their left hand and forearm is also prevalent. This discomfort is often caused by sustaining an unnatural hand or arm position during violin practice and the need to strengthen and stretch the surrounding muscles. Remedying violin left-hand pain involves finding a neutral hand shape and supplementing practice with targeted exercises and stretches.
Prevent Violin Left-hand Pain By Finding Your Neutral Hand Shape
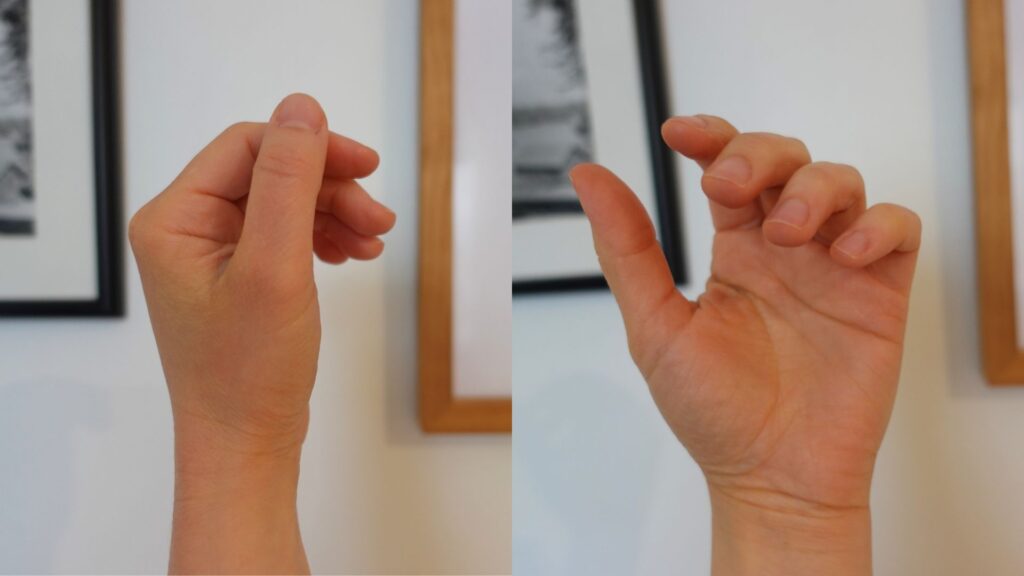
When there is tension in the arm or hand for a sustained period of time, such as during violin practice, it often results in pain. To reduce tension in the left hand while playing violin, it’s important to first find what the left hand looks like when it’s totally relaxed.
- Relax your arm down by your side and notice the shape of your hand
- Lift your hand up and try to maintain the same relaxed hand shape. Notice the curves of your fingers and thumb
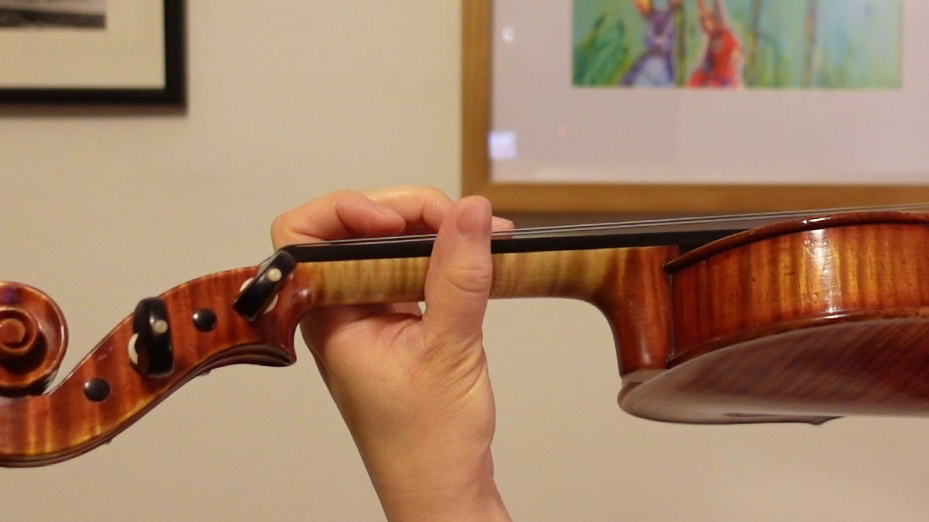
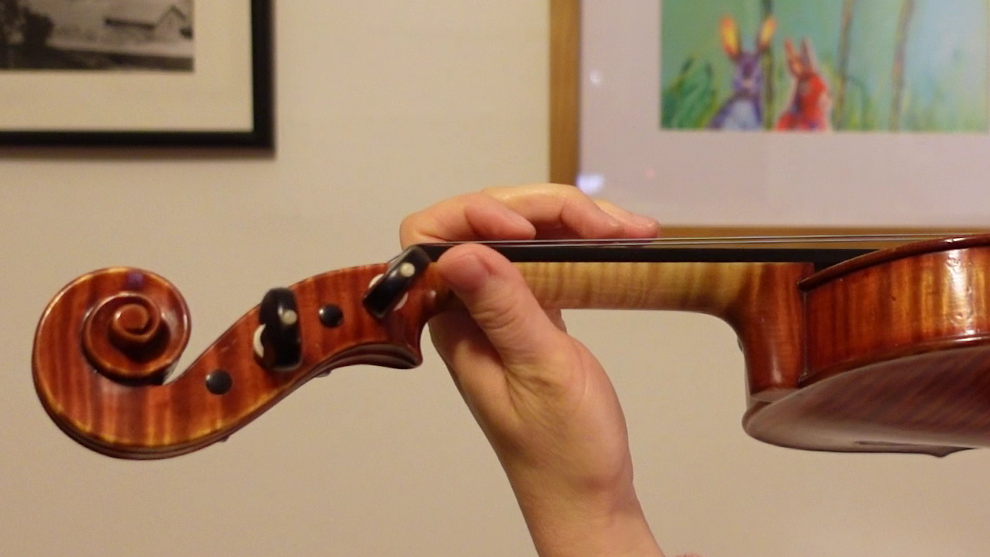
3. Place the violin into playing position and slot your violin neck between the pad of your thumb and the base of your index finger. Try to keep the same neutral hand shape; do not squeeze or manipulate your hand frame.
Most Violin Teachers Disagree On Left Hand Positioning!
It’s interesting that several famous violin pedagogues had differing opinions on where the thumb should sit on the neck of the violin.
Auer:
Galamian:
Flesch, Sevcik:
Suzuki:
Fischer:
However, I tend to agree with Simon Fischer. In Basics, he wrote: “If the hand and arm are completely relaxed, whatever position the thumb naturally arrives at is the correct position for that particular hand.”
Thumb and Wrist Positioning To Prevent Left-hand Pain While Playing Violin
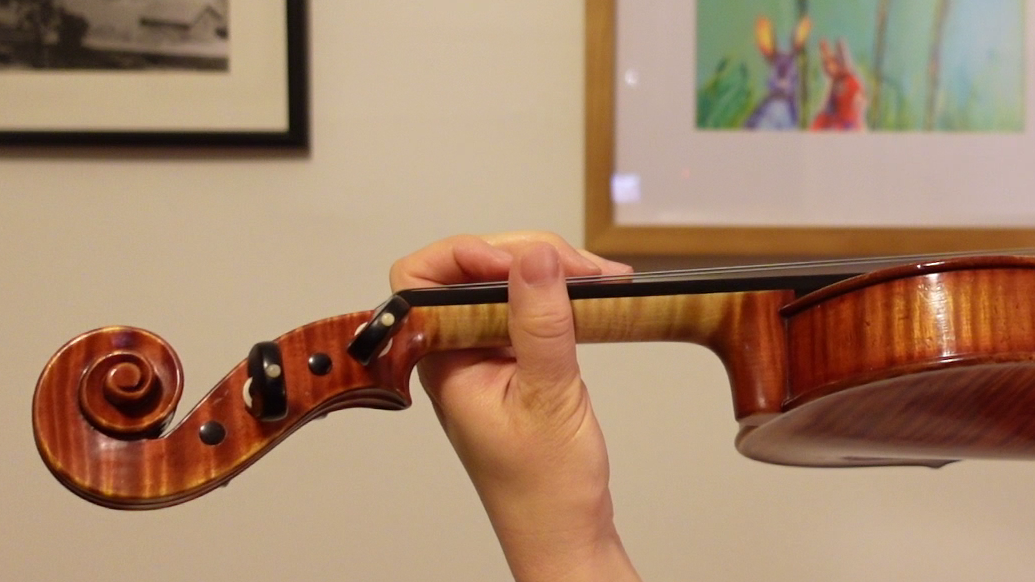
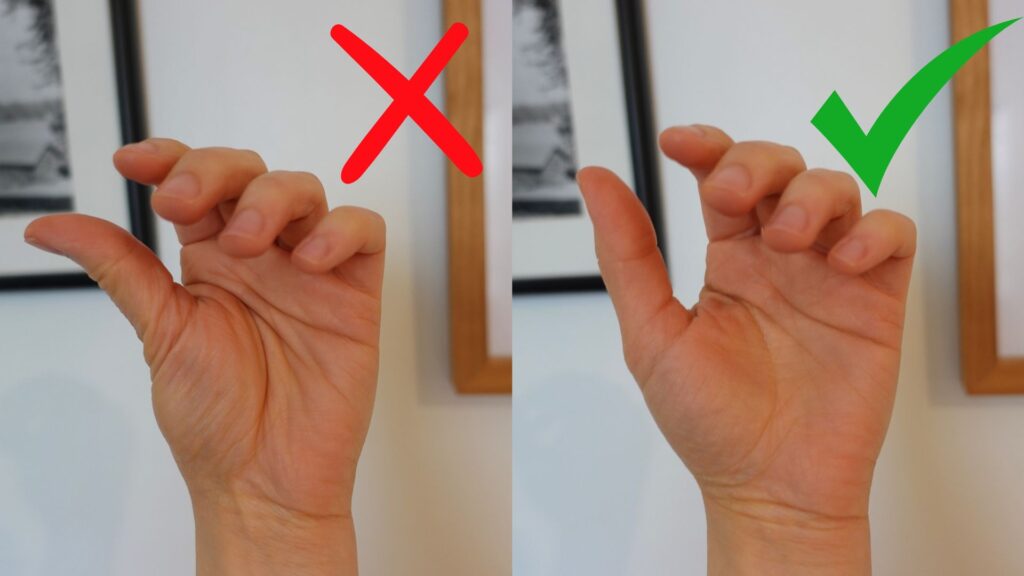
The thumb has three joints, and the bottom joint is “hidden” within the palm of the hand, closer to the wrist. When playing violin, it is important to not lock that bottom joint.
Without holding your violin, experiment with “locking” the bottom joint of your thumb and then releasing it. You’ll notice your palm is more open when the bottom thumb joint is relaxed. Keeping this open palm while playing violin will help you to reduce left-hand pain.
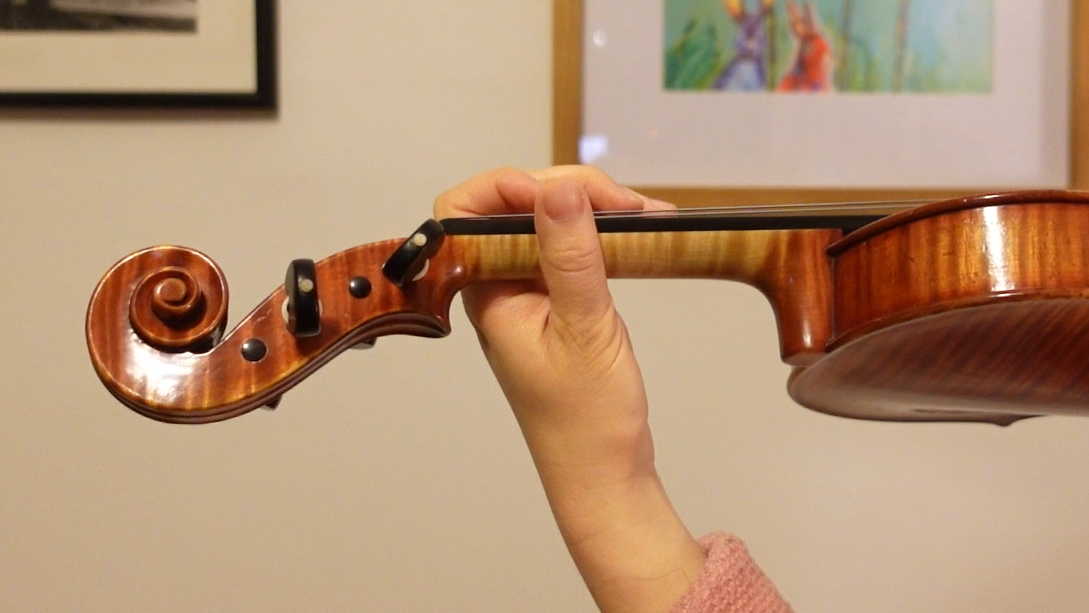
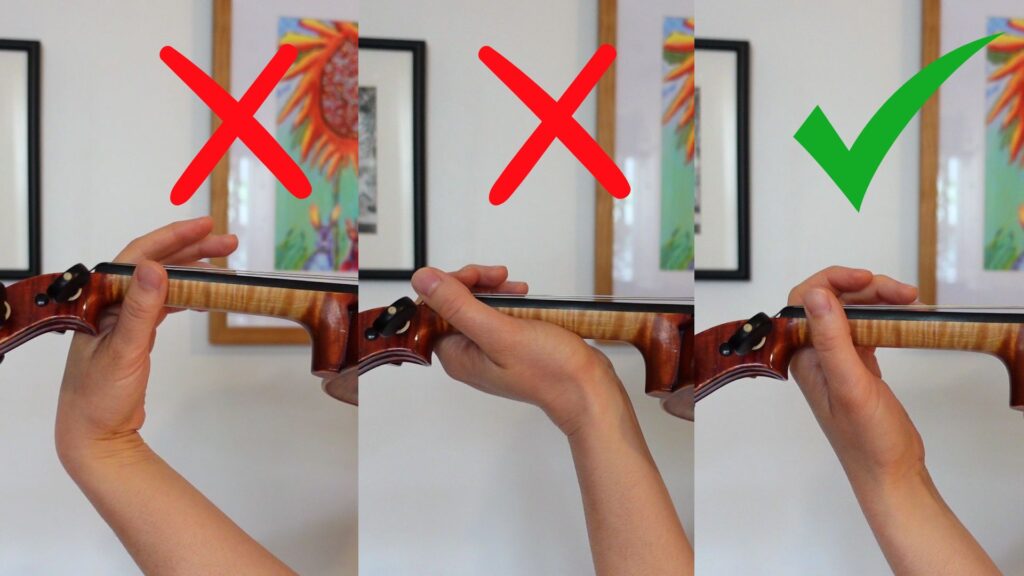
The wrist is controlled by muscles originating on the forearm. Therefore, to keep wrists healthy, the forearm muscles should be strengthened and stretched regularly. The wrist should be neither in flexion or extension when playing violin but aligned in a neutral (straight) position to prevent strain on the forearm muscles.
Violin Warm-up to promote relaxation and prevent left-hand pain while playing violin
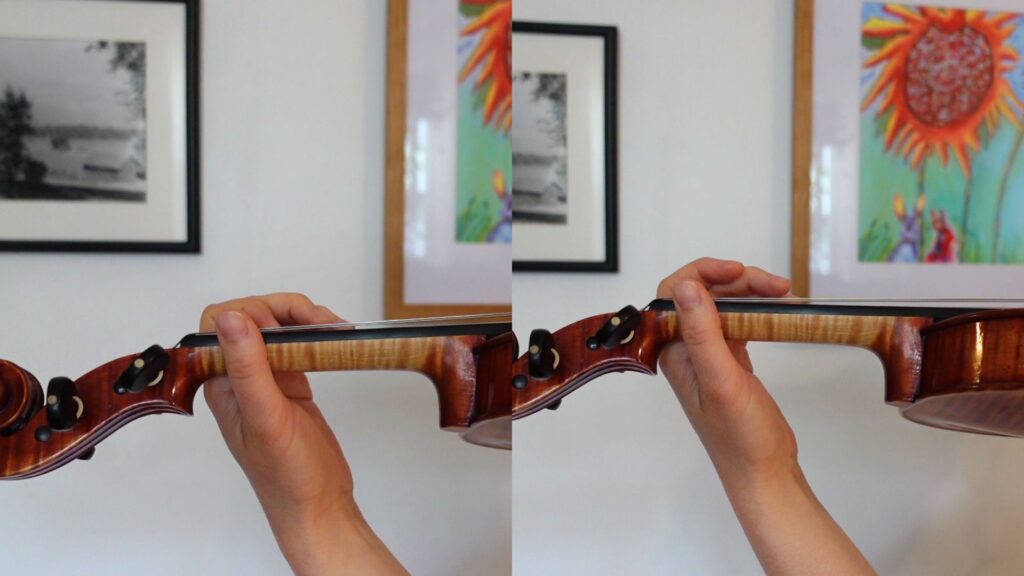
While playing violin, the shape of your left hand must change to accommodate shifts, extensions, double stops, and other techniques. It’s totally fine that the shape of your hand changes as you play, however, you can continually return to “neutral” whenever possible.
This is a violin warm-up exercise that will help you stop squeezing the neck of the violin with your thumb as you play. It combines all the possible finger combinations while keeping the thumb away from the neck of the violin. Place your scroll against a wall if you need support to keep the violin up without the help of your thumb. This exercise comes from Simon Fischer’s book Basics.
Exercises for violinists to stretch and strengthen the hands, wrists and forearms
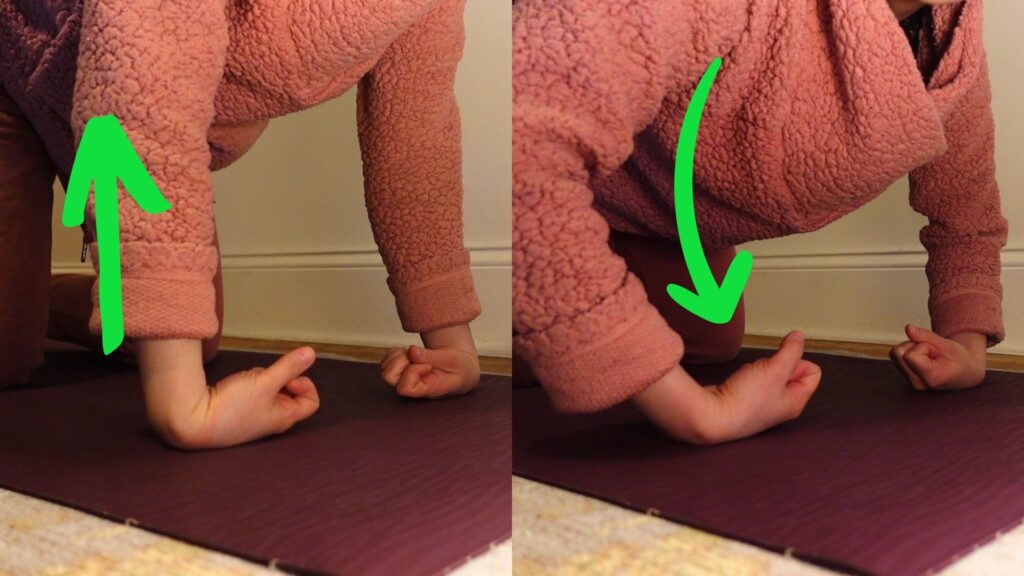
1. Stretch and strengthen the outer forearms
Start in a table-top position on hands and knees. Flip your palms to face up so that the backs of your hands are down, fingers pointing in towards each other. Create a loose fist with your hands. If your wrists or arms feel particularly tight, you can leave your fists open. Alternate straightening and bending your arms. You should feel a sensation in your forearms as they stretch and strengthen with this movement.
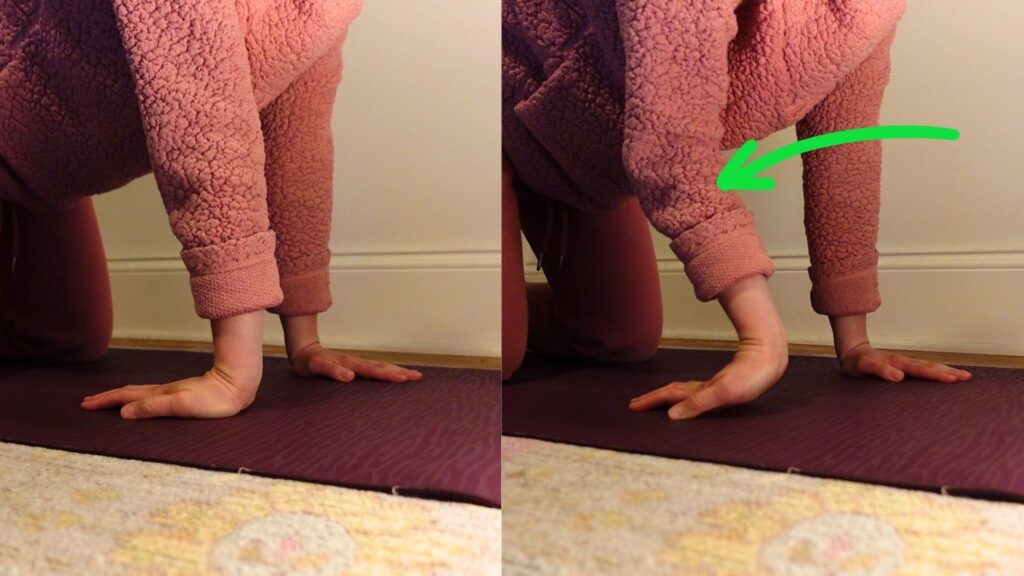
2. Stretch and strengthen the inner forearms
Start in a table-top position on hands and knees. Turn your left hand so that the fingers face your left knee, wrist faces forward, palm of the hand down. Gently and slowly bend your left elbow back towards your left thigh, allowing your palm to roll up off the ground. Slowly roll your palm back down until your left arm becomes straight again. You should feel a sensation as your left arm stretches and strengthens through this slow and intentional movement. Repeat on the other side.
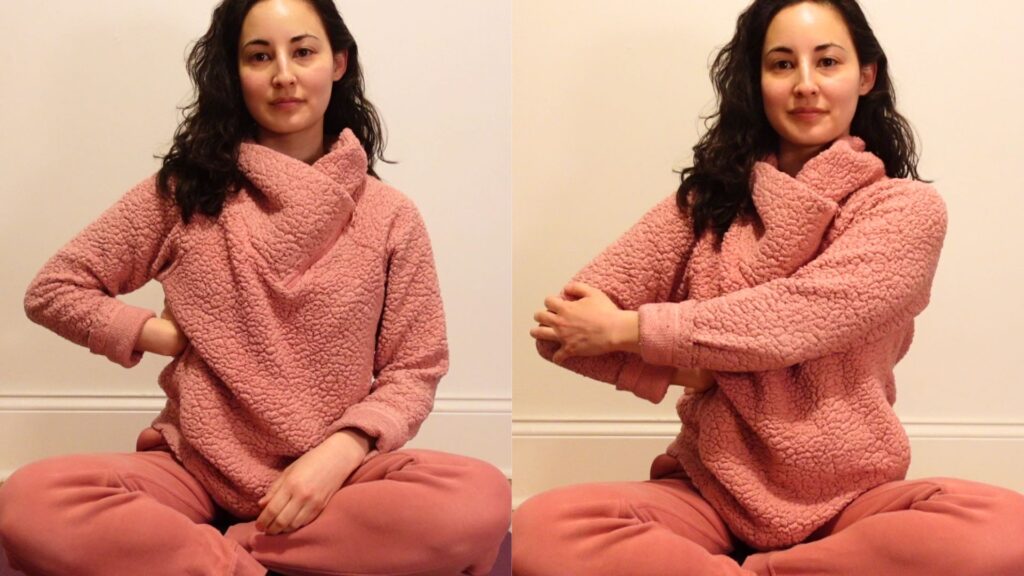
3. Seated stretch for the forearm
Sit tall and bend your left elbow out to the left. Place the back of your left hand against your left side ribs. Use your right hand to place a gentle weight on your left arm. Without force, allow the weight of your right hand to pull your left arm forward. You should feel a stretching sensation along your left outer forearm.
It Takes Time and Patience to Correct Violin Left Hand Pain
It can take a lot of time and patience to correct your alignment, especially if you’ve spent years developing the habit of playing in a way that is causing you pain.
However, you don’t have to try to fix this on your own.
I work with violin students all over the world to help reduce pain and find a more natural way of playing. If you would like clarification on any of these exercises or need help finding the right alignment for your violin-playing, schedule an intro lesson with me. I offer remote one-on-one lessons on topics ranging from reducing pain and finding proper alignment to repertoire-based lessons.
Let’s reduce violin hand and arm pain together
Work with me to find your neutral alignment and play violin pain-free.
Sources:
While writing this article, I referred to Simon Fischer’s book, Basics, to clarify and double-check my knowledge on certain things. I highly recommend this book to all violin teachers or students.
I also referenced Judith Hanson Lasater’s book Yoga Body for additional information and clarification about wrist and forearm anatomy.
More articles about overcoming violin pain:
- 5 New Strategies For Violin Neck and Shoulder Pain
- How To Deal With Recurring Violin Pain
- How to Hold the Violin to Relieve Neck Pain
- How to Solve Shoulder Pain for Violinists
Kiyoe Matsuura is a violin teacher trained in the Suzuki Method. She is also a certified yoga instructor. She uses her research of movement and anatomy to help violin students reduce pain and play with more comfort and ease.